


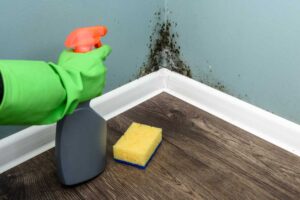
In recent years, there has been a growing awareness of the problem of mold growing in your home or office, and the ill health effects it can cause. Mold remediation, either on a DIY basis or via professional mold removal companies, is how a mold problem can be dealt with, and a home or office rendered habitable and safe once again.
The exact process used will vary somewhat based on the kind of mold you may have, and what kind of mold remediation route you choose. However, in general, the process can be broken down into 10 logical steps, that are almost always part of a good mold remediation plan.
This article will cover those 10 logical steps for mold remediation, as well as answer some common questions about mold removal cost, whether or not DIY mold removal is a good idea, and much more. First, however, let’s briefly discuss the health problems that mold can cause, and why mold remediation is so important.
Why Mold Remediation is So Important
By now, most people have heard about the hazards of mold, and the problems of mold growth indoors. This almost always requires mold remediation to address. While not all mold is created equal, and so-called black mold removal is of paramount concern, there’s no doubt that multiple kinds of mold can cause a myriad of ill health effects.
We’ve previously documented the problem with mold in several articles on our blog, so we won’t spend too much time on it here. Rather, we’re just going to review the key points.
Mold growing in your home or office is usually caused by the presence of excess moisture. This can include humidity as well as actual liquid water, such as from a leaking appliance or fixture. Mold spores, naturally found in the air both indoors and outdoors, can take hold under the right conditions – an ideal mix of high humidity and hospitable temperatures – and become a major problem, with mold on walls, behind drywall, under floors, in ceilings, and elsewhere throughout the building.
Mold infestations increase the number of spores (and their byproducts) that circulate in the air in the building. This can cause significant health effects, especially in those who are pre-disposed to being sensitive to mold or spores, or have existing health conditions that can be exacerbated by the mold problem. Health effects can include:
- Asthma and other breathing-related problems
- Allergies and allergic symptoms
- Increased inflammation in the body
- Increased activity in auto-immune responses or individuals with existing auto-immune conditions
- Sinusitis or Rhinitis
- Pneumonia
- Neurological impartment
- In extreme cases, death
The worst types of molds, commonly called black mold or toxic mold, are actually a range of species that produce what are known as mycotoxins. These are byproducts of the mold’s natural growth and metabolic processes, and can be extremely toxic, usually from chronic (daily) exposure rather than acute exposure. In all cases, since it’s impossible to simply glance at mold growth and know what you are dealing with, it’s vital to immediately begin a mold remediation routine once you find mold on walls, floors, ceilings, or elsewhere.
10 Steps to Effective Mold Remediation
Undertaking mold remediation is a complex process, and usually is best left up to professional mold specialist and mold mitigation and remediation companies. However, DIY mold removal is possible, provided you have the technical support and expertise, tools, and knowledge needed to complete it.
This guide, however, is primarily aimed at discussing the 10 steps to proper mold remediation for consumers, who by large majorities don’t attempt DIY mold removal, and rather engage the services of professionals. Therefore, we won’t go into extreme detail on some of the steps of the actual “how to clean mold” process, since that could fill several articles by itself. Rather, this is an overview of what consumers can expect from the mold remediation process in general.
#1 – Recognize the Problem
Like the solution to any problem, it is first necessary to recognize that there is a problem, and identify it: mold. Whether you see mold on walls, under sinks or cabinets, on ceilings, or elsewhere in the building, or simply suspect a mold problem, recognizing that there is a problem that needs fixing is the obvious first step on the road to mold remediation. It’s not necessary at this stage to know, necessarily, that you do have a mold problem, or that you’ll be removing black mold or other toxic species.
You might not even have a full-fledged mold infestation or colonization going on yet, but are worried about one developing following water damage, leaks, and so on. In any case, you are better safe than sorry, and if experts don’t find a need for mold control or mold remediation methods, at least you’ll have peace of mind and be able to put this problem aside in short order.
#2 – Have a Mold Specialist Inspect and Test
The second step in the mold remediation process is to involve a professional mold specialist or mold inspection company. They can come into your home or office, inspect the conditions and any growth that may be present, and take cultures to send off to a lab. This can help identify the type of mold, and is integral to mold control and mold remediation. While it’s usually recommended to address any mold growth, knowing whether or not you’re dealing with a toxic, dangerous mold, or more run-of-the-mill variety, will often determine elements of how urgent the problem is, and may play into the mold removal cost as well.
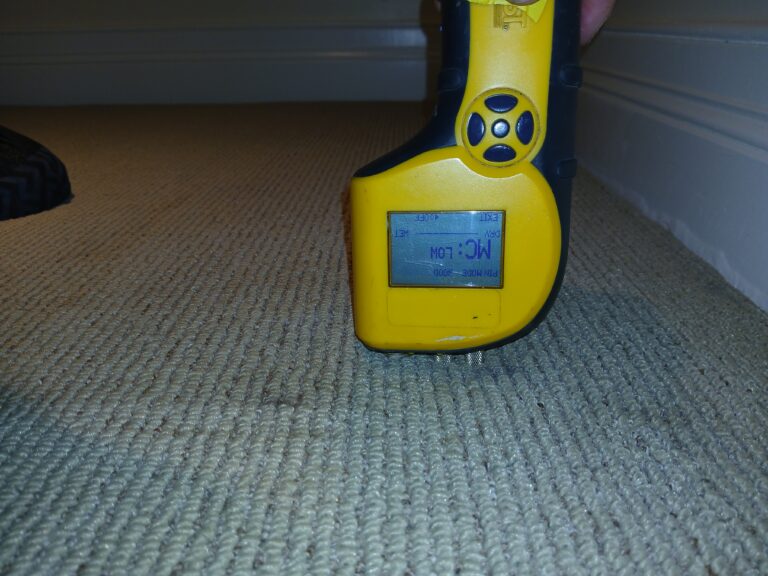
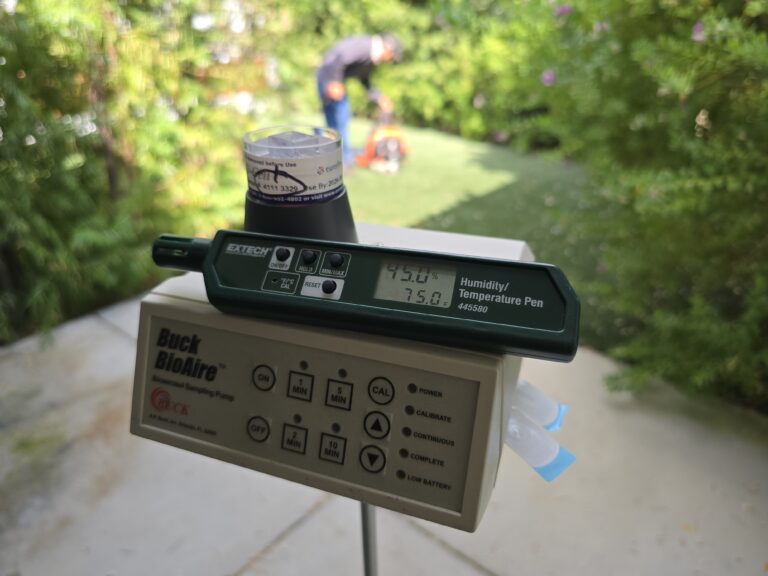
At this stage of the mold remediation journey, the mold specialist can often take other readings and measurements, such as ambient temperature and humidity in areas where mold growth is visible or suspected, and through discussion and inspection, start to develop indications of what the root cause or causes of the mold infestation may be. This will play a role in several of the subsequent steps in the mold remediation process.
#3 – Document the Extent of the Mold Situation
As mentioned above, either as part of the mold inspection or subsequent to that, it’s useful to document the extent of the mold situation, and the conditions in the building that may have resulted in the mold growth in the first place. Photos, video, lab results (once available), and the findings of the mold inspectors are all useful, as well as any documentation of recent history that may have contributed to the growth of mold (such as flooding, plumbing problems, etc.). All of this information taken together will help to define the parameters of the mold remediation plan in later steps.
#4 – Obtain Results from Mold Inspection
In a few days to a few weeks, the mold samples and swabs taken during the mold specialist inspection should have grown in the lab, and results should be available. The mold inspector will typically review these results with you, and make recommendations as to the severity and urgency for mold remediation and mold mitigation measures. Some inspection companies also offer mold removal services, or work with reliable mold remediation companies that they can recommend to you, even if they don’t do mold remediation themselves (they are often two very different skill sets requiring very different expertise and equipment).
#5 – If Necessary, Evacuate the Home Until Mold Remediation is Complete
Depending on the results from lab testing, the mold specialist may advise or recommend that you and your family, co-workers, or other relevant inhabitants of the building should evacuate or use an alternate location until mold remediation has been completed. In the case of mycotoxin-producing molds, even a week or two of exposure for 8+ hours a day can trigger serious symptoms in susceptible individuals. By contrast, less serious mold problems may not be as urgent, and while all mold should be removed, may not pose an immediate health threat, allowing for a more relaxed, in-situ mold remediation timetable.
#6 – Find the Root Cause and Correct
Before finalizing a mold remediation plan, it’s important to identify the root cause of the problem and correct it. After all, fixing the symptom (mold infestation) without addressing the root cause will simply result in additional infestation, requiring additional rounds of mold remediation, in an endless loop.
Rather, the root cause – whether a one-off event like flooding or a broken pipe, or a persistent problem with ventilation and humidity – must be identified and corrected or modified. This can take place prior to mold remediation, during the mold control process, or afterwards, depending on the types of mold involved, the issues at hand, and recommendations from mold specialists.
#7 – Develop a Mold Remediation Action Plan
After identifying the mold types, extent of the damage, and the root cause of the problem, a mold remediation action plan can be developed. When engaging professional mold control or mold remediation specialists, they will often make the recommendations to you as a consumer as to what should be done. Absent your own expertise, it’s best to follow the advice of these professionals, so that the mold remediation and removal will be thorough and as complete and effective as possible.
They may offer you a few different options with different mold removal costs, so it’s always important to ask questions and get answers before you commit to a particular mold remediation action plan. You may also find a second opinion or second company’s remediation plan instructive for comparing costs and options, but that’s often not necessary if you’re dealing with a reputable, well-reviewed mold removal company.
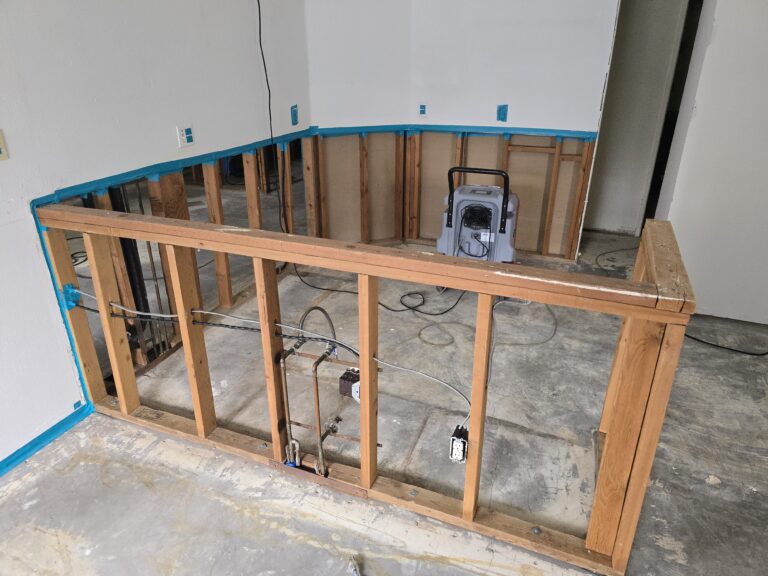
#8 – Conduct Remediation Action(s)
After the plan is developed, the actual mold remediation itself takes place. Mold removal companies have a variety of methods and tools used to remove existing mold and mold-damaged elements from your home. Depending on the type of mold and extent of the problem, this may involve mold removal spray or coatings, gutting drywall or flooring, or simply cleaning the mold-affected area and heavily ventilating it for several days. The exact methods for how to remove mold will, of course, vary depending on the particulars of a given building and infestation, as well as the capabilities and experience of the mold remediation company.
#9 – Post-Remediation Inspection
Following the actual mold remediation process, a post-remediation inspection is fairly typical. After sufficient time has passed (where regrowth would occur if the remediation was unsuccessful), mold specialists can conduct another inspection, using their tools, swabbing for samples, and so on. Most importantly, they can provide you with details on the humidity and temperature conditions throughout the building, and gauge the efficacy of the efforts to get at and correct the root cause of the mold infestation in the first place.
#10 – Periodic Follow-up and Monitoring
Over time, it’s useful to have periodic follow-up and monitoring appointments, to ensure that no mold infestation returns. This can be at an interval chosen and discussed with your mold remediation or mold specialist or inspection company, though every quarter, half-year, or year are the most typical time tables. These follow-up or monitoring inspections will help to spot any regrowth that may occur, determine if it is the same or a different mold, if it is harmful, and allow for more targeted mold remediation efforts to take place – hopefully before any mold regrowth has spread to a full-blown, building-wide infestation. That will help save on any future mold removal costs, time, and so on.
Key Signs You Need Mold Remediation
Aside from being unsightly, mold, depending on the extent and type, could negatively affect your health. That is why it is important to identify the signs of mold and deal with it early before it becomes a major problem requiring extensive remediation.
So, what are the key signs of the presence of mold?
- Look for the obvious: Visible mold growth is the clearest sign of the presence of mold. It appears as black, green, grey, white, or brown patches or spots. Its texture ranges from slimy to dry and powdery.
- Trust your nose: Another way to detect mold early is to trust your sense of smell. Mold gives away a persistent musty odor, which comes from the compounds it releases as it grows. If the smell is stronger in certain areas, you most likely have a mold issue.
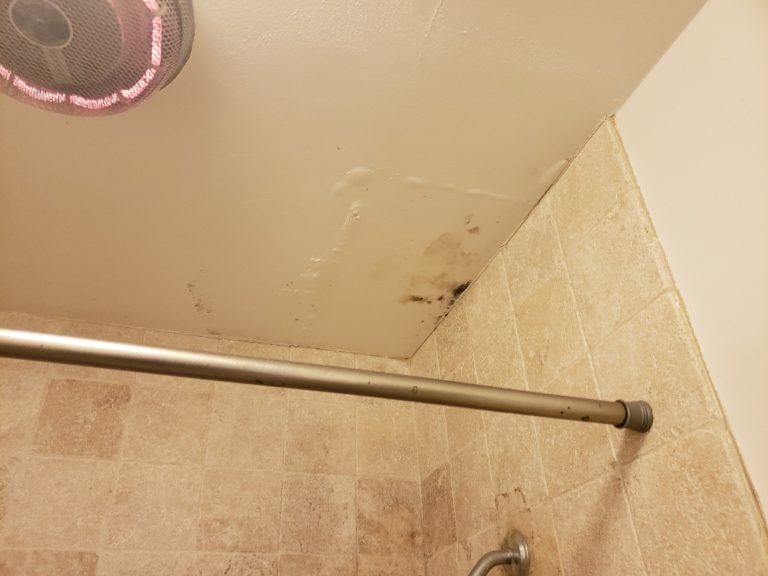
- Unexplained dampness: Does a particular room always feel damp? Do you frequently notice condensation in walls or windows? Moisture creates the perfect conditions for mold growth, meaning there might be mold in a damp room even if you haven’t seen it yet.
- Health problems: Do you suffer allergy-like symptoms, like sneezing, eye irritation, and coughing? Do these symptoms worsen when you are at home? Mold could be the culprit.
Watch for these signs and investigate to determine whether you have a mold problem. The earlier you identify the problem, the easier and cheaper the mold remediation process will be.
DIY Mold Removal vs. Professional Mold Remediation
The internet is full of DIY mold removal tips, and it’s tempting to save money by doing mold remediation yourself. But is it worth the risk?
Before you grab the bleach and working gloves, it is important to weigh the risks and limitations of doing it yourself against the convenience of professional mold remediation services.
Go the DIY mold removal route for:
- Small, contained areas: If the mold is limited to a small area, say less than a square foot, on a hard, non-porous surface like tile, DIY mold removal could be a good option.
- Quick action: If you have caught the mold early, you should address it immediately to prevent it from spreading. You can use materials like detergent that are already available at home.
You should seek professional mold remediation services for the following reasons:
- Safety: Some molds are toxic. Additionally, when mold is disturbed, it releases spores into the air, which can be dangerous to inhale. Professionals have protective gear to guard against the spores and toxic molds.
- Hidden mold: Mold tends to hide under floors, in air ducts, walls, and other hard-to-reach places. What is visible on the surface might be the tip of the iceberg. Professional mold removers have tools to investigate the full extent of the spread of the mold.
- Addressing the source: Removing the visible mold is one thing. Preventing it from coming back is a different story. Professionals will help you identify the source of the mold (which is often moisture) and how to prevent it from growing back. The steps to take to prevent it from growing back in the future.
If you’re unsure about the extent of your mold problem, err on the side of caution and seek professional help. Keep in mind that professional mold remediation ensures safety, thorough removal, and lasting solutions. Your health and peace of mind are worth the cost of professional mold remediation.
How to Prevent Mold Growth: Proactive Tips for a Mold-Free Home
The best way to deal with mold is to stop it from growing in the first place. Here are some easily applicable tips to help keep your home free from mold:
- Control the humidity: Mold thrives in dampness. Keep your indoor humidity below 50% and use a dehumidifier in humid areas, especially basements and bathrooms.
- Ventilate: Airflow is your friend. Run exhaust fans when cooking or showering and open windows whenever possible (weather permitting) to let fresh air circulate.
- Fix leaks ASAP: Dripping faucets? Leaky roof? Don’t wait! Even small leaks provide enough moisture for mold to take hold. Addressing plumbing and structural issues promptly goes a long way in preventing mold growth.
- Dry things quickly: Wet towels, spills, or dampness from floods need to be dried within 24-48 hours to prevent mold from taking hold.
- Sunshine is your ally: Sunlight is a natural mold deterrent. Let sunlight into your home as much as possible.
Pay extra attention to problem areas, including bathrooms, basements, crawlspaces, and around appliances like air conditioning and refrigerators.
Frequently Asked Questions About Mold Remediation
What is the average cost of mold remediation?
Like most home services, the exact cost of mold remediation will vary considerably based on geographic area, the extent of the infestation, type of mold, size of the building, and so on. Purely on national average cost terms, most customers find that mold specialist inspections are quite affordable, at a few hundred dollars in most cases.
The actual costs can increase somewhat if significant lab work is required. Mold removal costs run from as low as $500 for minor problems to $10,000 or more for full-fledged, multi-room mold growth. Put another way, most consumers find that mold remediation in the US today costs between $12 and $30 per square foot of affected area.
Do I really need mold remediation?
It’s always advisable to conduct mold remediation, even if the mold is not one of the toxic types. Even innocuous mold can eventually cause health effects in susceptible individuals. It can also cause structural weakening and damage to the building, produce off-putting odors, and generally cause more problems the longer and more widespread it gets.
Mold remediation ends up being more costly the longer you wait, since the mold will have more and more time to spread (and thus more area in the building that requires eventual mold remediation). Therefore, it’s best to seek out mold remediation as soon as possible in the case of any mold growth. Small infestations isolated to a single cabinet or under a sink may be reasonable cases for DIY mold removal, but it is still recommended that you consult a mold specialist, as the damage may be far more widespread than it first seems.
Can you do mold remediation yourself?
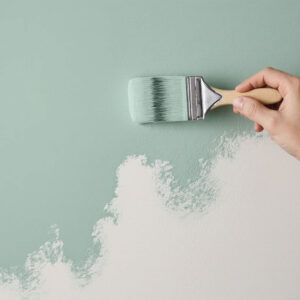
DIY mold removal is possible, though not recommended. Too often, consumers may see a small amount of mold on walls or in some other visible area, and think they can simply clean and repaint or seal that area, and the problem will be taken care of. Without professional inspection or an analysis of the root cause, your DIY mold removal won’t necessarily be effective.
Visible mold on walls could be a sign of a much more extensive mold growth situation behind drywall, under flooring, in ceilings, and other areas that you can’t plainly see. DIY mold removal also is generally less effective, even with small mold problems, since the kinds of chemical and mechanical means of mold control that professionals have access to are generally superior to off-the-shelf solutions from your local hardware store.
Is black mold dangerous if not disturbed?
Black mold – which is not always black – is a short-hand name for any kind of toxic mold in the home. In reality, there are several species of molds that can be toxic, and not all have a black appearance. These molds, which produce mycotoxins as they grow and proliferate, are dangerous whether or not they are disturbed. Spore and mycotoxin circulation in the air takes place regardless of how disturbed or “left alone” the moldy areas may be. The mold can also spread in areas you can’t see, increasing the output of spores and toxins in a vicious cycle, and making eventual mold remediation more expensive and time-consuming.
Concluding Thoughts
If you suspect a mold problem, the best advice we can provide is to seek out the services of mold specialists for an inspection as soon as possible. If they confirm a problem in your home or office, you’ll now have a better sense of the mold remediation process and how it typically progresses.
We can’t stress enough that mold remediation is usually easier and less expensive the sooner it is begun following a mold growth problem. Don’t wait until someone gets sick or there’s visible mold on walls throughout your home. Rather, have a professional mold control and inspection specialist assess the problem, and help you develop a mold remediation plan as soon as possible!


